Simulate Route
Setup
Prerequisites
Run the example
Start a terminal/command prompt and go to the simulate_route directory,
within the flutter examples directory
Build and run the example:
Build and run
|
Note - the gem_kit directory containing the Maps SDK for Flutter
should be in the plugins directory of the example, e.g.
simulate_route/plugins/gem_kit - see the environment setup guide above.
Download project dependencies:
|

flutter upgrade
|
run the following terminal commands in the project directory,
where the pubspec.yaml file is located:
flutter clean
|
flutter pub get
Run the example:
flutter run
|

If such a question appears, select the chrome browser; in the above example, press 2.
First, verify that the ANDROID_SDK_ROOT environment variable
is set to the root path of your android SDK.
In android/build.gradle add the maven {} block as shown,
within the allprojects {} block, for both debug and release builds,
without the line numbers, those are for reference:
1allprojects {
2    repositories {
3        google()
4        mavenCentral()
5        maven {
6           url "${rootDir}/../plugins/gem_kit/android/build"
7        }
8    }
9}
in android/app/build.gradle
within the android {} block, in the defaultConfig {} block,
the android SDK version minSdk must be set as shown below.
Additionally, for release builds, in android/app/build.gradle,
within the android {} block, add the buildTypes {} block as shown:
 1android {
 2    defaultConfig {
 3        applicationId "com.magiclane.gem_kit.examples.simulate_route"
 4        minSdk 21
 5        targetSdk flutter.targetSdk
 6        versionCode flutterVersionCode.toInteger()
 7        versionName flutterVersionName
 8    }
 9    buildTypes {
10        release {
11            // TODO: Add your own signing config for the release build.
12            // Signing with the debug keys for now, so `flutter run --release` works.
13            minifyEnabled false
14            shrinkResources false
15            signingConfig signingConfigs.debug
16        }
17    }
18}
Then build the apk:
flutter build apk --debugflutter build apk --releasebuild/app/outputs/apk/debug or
build/app/outputs/apk/release subdirectory,
for debug or release build respectively,
within the current project directory, which is simulate_route in this case.app-release.apk or app-debug.apkadb push app-release.apk sdcardAnd then click on the apk in the file browser on the device to install and run it.
In the ios/Podfile configuration text file, at the top, set the minimum ios
platform to 13 like this:
platform :ios, '13.0'
pod install in the [ios folder] ./ios/flutter build ios to build a Runner.app.flutter run to build and run on an attached device.<path/to>/ios/Runner.xcworkspace project in Xcode and execute and debug from there.How it works
In the simulate_route project directory, there is a text file named
pubspec.yaml which contains project configuration and dependencies.
The most important lines from this file are shown here:
 1name: simulate_route
 2version: 1.0.0+1
 3
 4environment:
 5  sdk: '>=3.0.5 <4.0.0'
 6
 7dependencies:
 8  flutter:
 9    sdk: flutter
10  gem_kit:
11    path: plugins/gem_kit
12
13# The following section is specific to Flutter packages.
14flutter:
15  uses-material-design: true
The project must have a name and version. The dependencies list the Flutter SDK, and the gem_kit, Maps for Flutter SDK.
The source code is in simulate_route/lib/main.dart
 1import 'package:simulate_route/bottom_navigation_panel.dart';
 2import 'package:simulate_route/instruction_model.dart';
 3import 'package:simulate_route/top_navigation_panel.dart';
 4import 'package:simulate_route/utility.dart';
 5
 6import 'package:gem_kit/gem_kit_basic.dart';
 7import 'package:gem_kit/gem_kit_map_controller.dart';
 8import 'package:gem_kit/api/gem_mapviewpreferences.dart' as gem;
 9import 'package:gem_kit/api/gem_navigationservice.dart';
10import 'package:gem_kit/api/gem_coordinates.dart';
11import 'package:gem_kit/api/gem_landmark.dart';
12import 'package:gem_kit/api/gem_routingpreferences.dart';
13import 'package:gem_kit/api/gem_sdksettings.dart';
14import 'package:gem_kit/api/gem_routingservice.dart' as gem;
15import 'package:gem_kit/widget/gem_kit_map.dart';
16import 'package:flutter/material.dart';
17
18void main() {
19  runApp(const MyApp());
20}
21
22class MyApp extends StatelessWidget {
23  const MyApp({super.key});
24
25  // This widget is the root of your application.
26  @override
27  Widget build(BuildContext context) {
28    return const MaterialApp(
29      debugShowCheckedModeBanner: false,
30      title: 'Build route example',
31      home: MyHomePage(),
32    );
33  }
34}
35
36class MyHomePage extends StatefulWidget {
37  const MyHomePage({super.key});
38
39  @override
40  State<MyHomePage> createState() => _MyHomePageState();
41}
The dart material package is imported, as well as the gem_kit
packages for the map controller, which enables user input such as pan and zoom,
the map package which draws the map, the routingservice which computes
a route, the landmark and coordinates packages for geolocation,
the navigationservice package which carries out both simulated and actual
navigation, and the settings and map preferences packages.
The map is in a widget which is the root of the application.
 1class _MyHomePageState extends State<MyHomePage> {
 2  late GemMapController mapController;
 3  late SdkSettings _sdkSettings;
 4  late gem.RoutingService _routingService;
 5  late NavigationService _navigationService;
 6  late InstructionModel currentInstruction;
 7
 8  List<Coordinates> waypoints = [];
 9  List<gem.Route> shownRoutes = [];
10
11  bool haveRoutes = false;
12  bool isNavigating = false;
13
14  @override
15  void initState() {
16    super.initState();
17    waypoints.add(Coordinates(
18        latitude: 48.875861, longitude: 2.3031139));
19    waypoints.add(Coordinates(
20        latitude: 48.8736188, longitude: 2.2951312));
21  }
22
23  Future<void> onMapCreated(GemMapController controller) async {
24    _mapController = controller;
25    SdkSettings.create(_mapController.mapId).then((value) {
26      _sdkSettings = value;
27      _sdkSettings.setAppAuthorization("YOUR_API_KEY_TOKEN");
28    });
29
30    _routingService = await gem.RoutingService.create(_mapController.mapId);
31    _navigationService = await NavigationService.create(controller.mapId);
32  }
The map is initialized with the map controller and the settings.
The waypoints for the departure and destination positions are hardcoded
in the void initState() function shown above.
Setting the API key
The string |
|

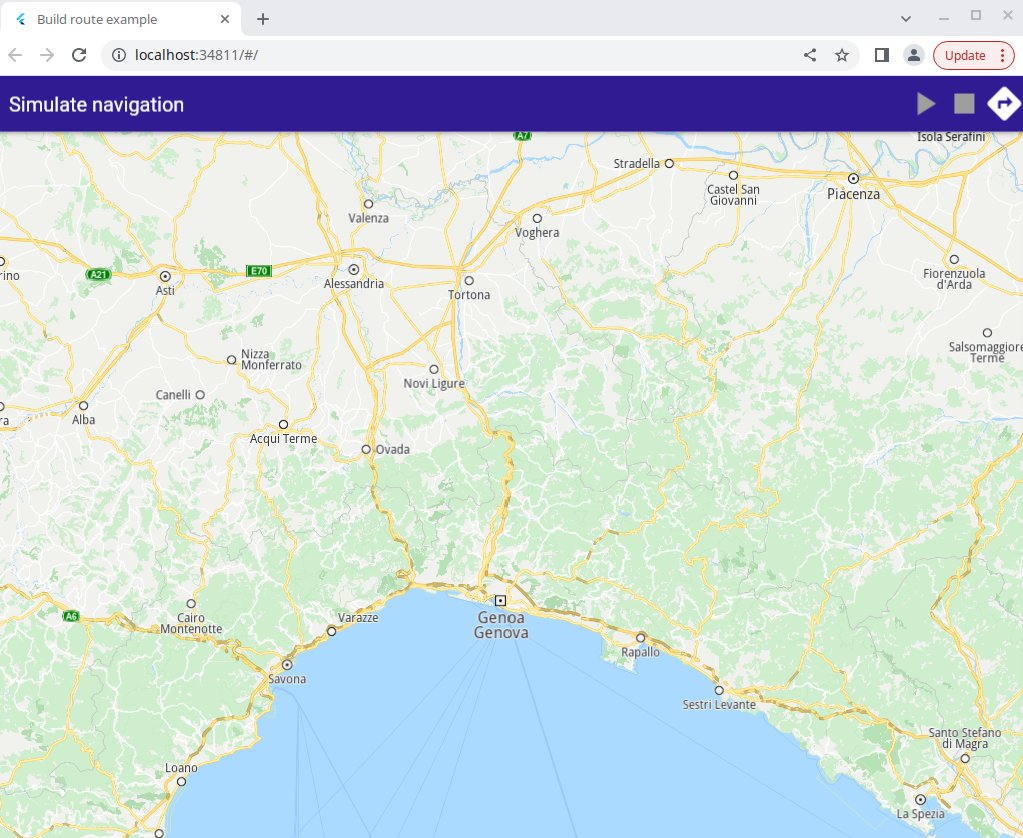
A tap on the arrow button at the top right causes a set of routes to be computed and rendered on the map.
 1// Custom method for calling calculate route and displaying the results
 2_onPressed(List<Coordinates> waypoints, BuildContext context) async {
 3   // Create a landmark list
 4   final landmarkWaypoints =
 5      await gem.LandmarkList.create(_mapController.mapId);
 6
 7   // Create landmarks from coordinates and add them to the list
 8   for (final wp in waypoints) {
 9      var landmark = await Landmark.create(_mapController.mapId);
10      await landmark.setCoordinates(
11         Coordinates(latitude: wp.latitude, longitude: wp.longitude));
12      landmarkWaypoints.push_back(landmark);
13   }
14   final routePreferences = RoutePreferences();
15
16   var result = await _routingService.calculateRoute(
17      landmarkWaypoints, routePreferences, (err, routes) async {
18      if (err != GemError.success || routes == null) {
19         return;
20      } else {
21         // Get the controller's preferences
22         final mapViewPreferences = await _mapController.preferences();
23         // Get the routes from the preferences
24         final routesMap = await mapViewPreferences.routes();
25         //Get the number of routes
26         final routesSize = await routes.size();
27
28         for (int i = 0; i < routesSize; i++) {
29            final route = await routes.at(i);
30            shownRoutes.add(route);
31            final timeDistance = await route.getTimeDistance();
32
33            final totalDistance = convertDistance(
34               timeDistance.unrestrictedDistanceM +
35               timeDistance.restrictedDistanceM);
36
37            final totalTime = convertDuration(
38               timeDistance.unrestrictedTimeS + timeDistance.restrictedTimeS);
39               // Add labels to the routes
40               await routesMap.add(route, i == 0,
41               label: '$totalDistance \n $totalTime');
42         }
43         // Select the first route as the main one
44         final mainRoute = await routes.at(0);
45         await _mapController.centerOnRoute(mainRoute);
46      }
47   });
48   setState(() {
49      haveRoutes = true;
50   });
51   return result;
52}
This is the custom method to compute a route by calling:
_routingService.calculateRoute(),
rendering the resulting set of routes on the map,
then choosing the route at index 0 (the first one),
setting it as the mainRoute and then
centering the main route so it fits in the viewport:
_mapController.centerOnRoute()
 1// Method for creating the simulation
 2_navigateOnRoute(
 3   {required gem.Route route,
 4   required Function(InstructionModel) onInstructionUpdated}) async {
 5 await _navigationService.startSimulation(route, (type, instruction) async {
 6   if (type != NavigationEventType.navigationInstructionUpdate ||
 7       instruction == null) {
 8     setState(() {
 9       isNavigating = false;
10       _removeRoutes(shownRoutes);
11     });
12     return;
13   }
14   isNavigating = true;
15   final ins = await InstructionModel.fromGemInstruction(instruction);
16   onInstructionUpdated(ins);
17   instruction.dispose();
18 });
19}
20
21// Method for starting the simulation and following the position
22_startSimulation(gem.Route route) async {
23 await _navigateOnRoute(
24     route: route,
25     onInstructionUpdated: (instruction) {
26       currentInstruction = instruction;
27       setState(() {});
28     });
29 _mapController.startFollowingPosition(
30     animation:
31         gem.GemAnimation(duration: 200, type: gem.EAnimation.AnimationLinear));
32}
The navigation simulation along the route is started by
await _navigationService.startSimulation()
and the camera is set to follow the current position arrow using
_mapController.startFollowingPosition()
|
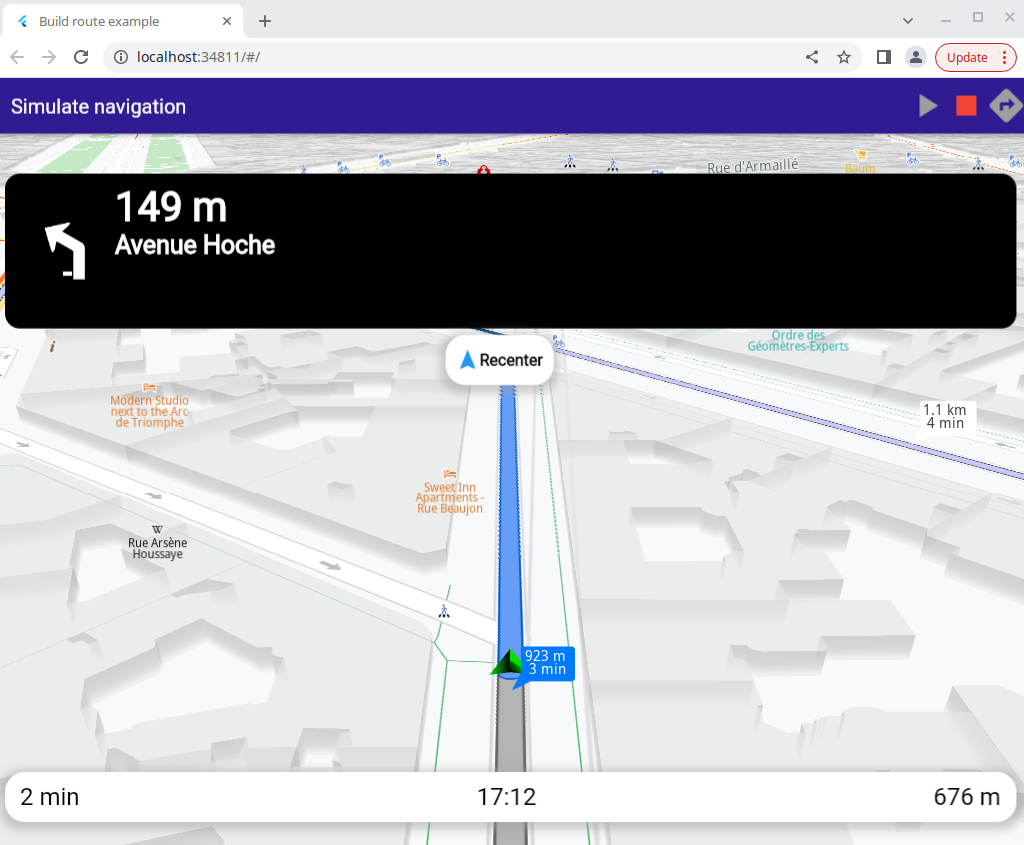
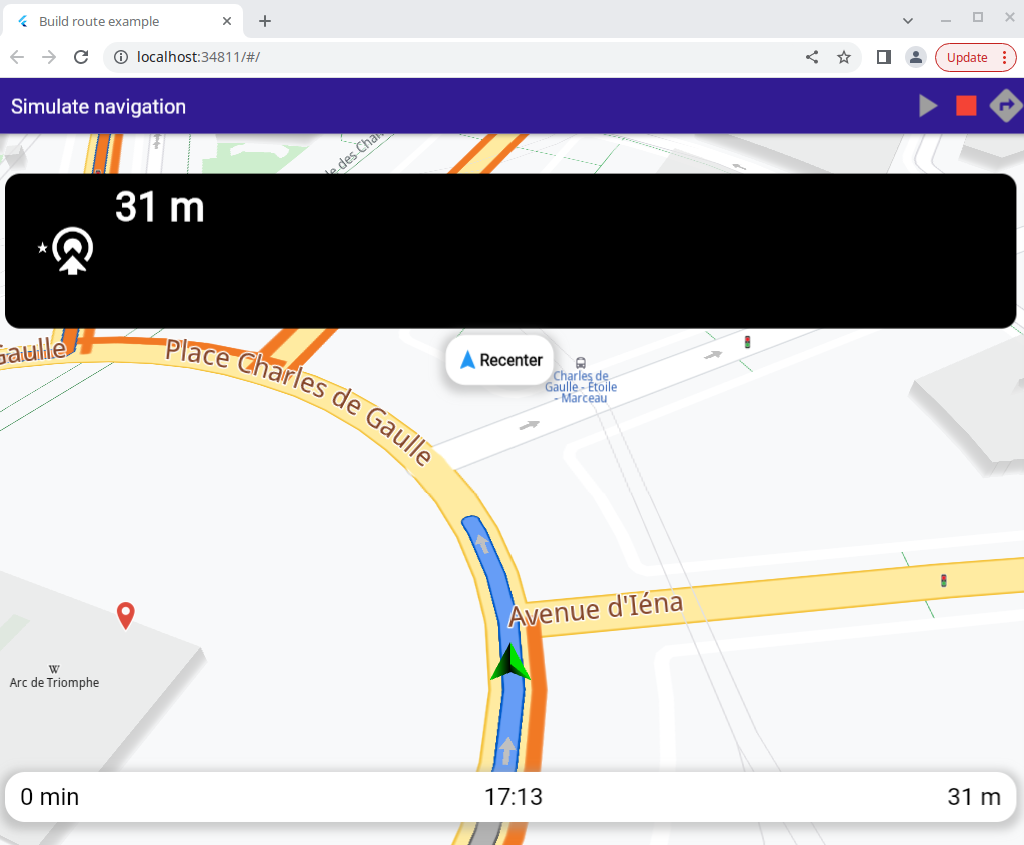
A tap on the green arrow button at the top causes the navigation simulation to start, and the camera to follow the simulated position.
 1_removeRoutes(List<gem.Route> routes) async {
 2  final prefs = await _mapController.preferences();
 3  final routesMap = await prefs.routes();
 4
 5  for (final route in routes) {
 6    routesMap.remove(route);
 7  }
 8  shownRoutes.clear();
 9  setState(() {
10    haveRoutes = false;
11    isNavigating = false;
12  });
13}
Function to remove the computed routes rendered on the map.
1// Method to stop the simulation and remove the displayed routes
2_stopSimulation(List<gem.Route> routes) async {
3  await _navigationService.cancelNavigation();
4  _removeRoutes(routes);
5}
Function implementing the red stop simulated navigation button.
 1@override
 2Widget build(BuildContext context) {
 3 return Scaffold(
 4   appBar: AppBar(
 5     title: const Text("Simulate navigation"),
 6     backgroundColor: Colors.deepPurple[900],
 7     actions: [
 8       GestureDetector(
 9         onTap: () => _startSimulation(shownRoutes[0]),
10         child: Icon(Icons.play_arrow,
11             size: 40,
12             color: haveRoutes
13                 ? isNavigating
14                     ? Colors.grey
15                     : Colors.green
16                 : Colors.grey),
17       ),
18       GestureDetector(
19         onTap: () => _stopSimulation(shownRoutes),
20         child: Icon(Icons.stop,
21             size: 40, color: haveRoutes ? Colors.red : Colors.grey),
22       ),
23       GestureDetector(
24         onTap: () => haveRoutes ? null : _onPressed(waypoints, context),
25         child: Icon(
26           Icons.directions,
27           size: 40,
28           color: haveRoutes ? Colors.grey : Colors.white,
29         ),
30       )
31     ],
32   ),
The green play button, the red stop button and the button to compute the routes.
 1  body: Stack(children: [
 2     GemMap(
 3       onMapCreated: onMapCreated,
 4     ),
 5     if (isNavigating)
 6       Positioned(
 7         top: 40,
 8         left: 10,
 9         child: NavigationInstructionPanel(
10           instruction: currentInstruction,
11         ),
12       ),
13     if (isNavigating)
14       Positioned(
15         bottom: 30,
16         left: 0,
17         child: NavigationBottomPanel(
18           remainingDistance: currentInstruction.remainingDistance,
19           eta: currentInstruction.eta,
20           remainingDuration: currentInstruction.remainingDuration,
21         ),
22       ),
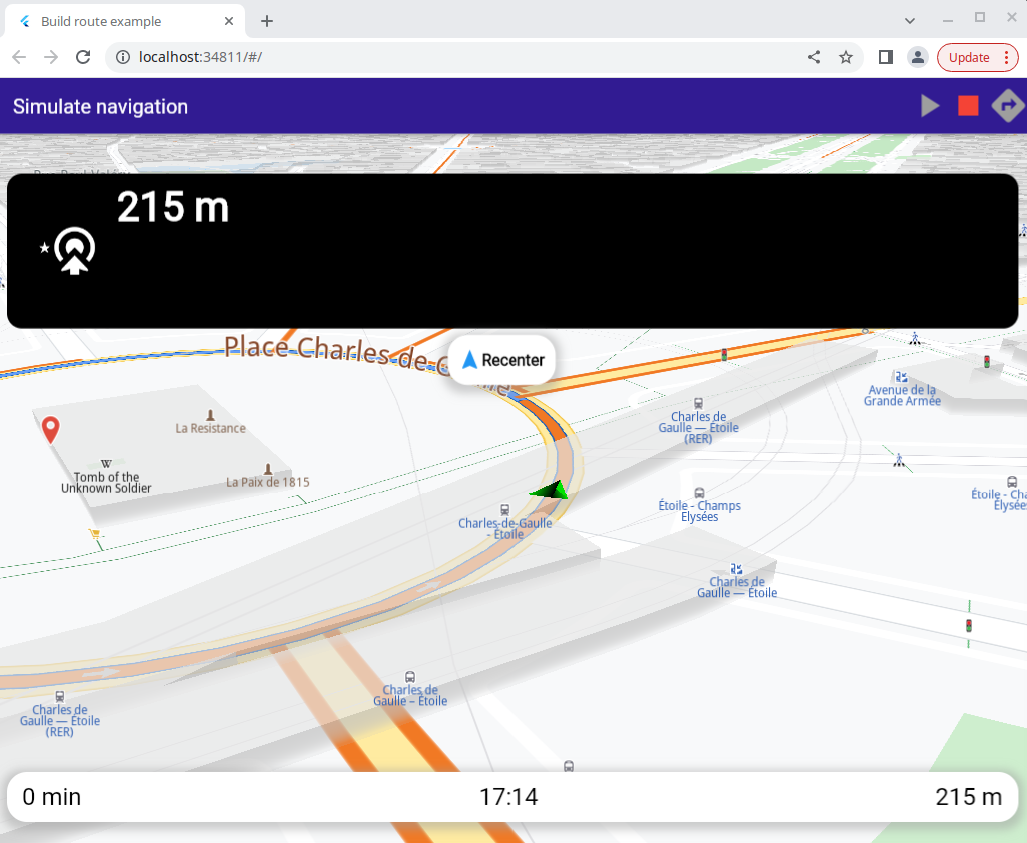
The top navigation panel, showing next turn icons and instructions, and the bottom navigation panel. These panels are shown when navigation, including simulated navigation, is active.
 1     if (isNavigating)
 2       Positioned(
 3         top: MediaQuery.of(context).size.height * 0.26,
 4         left: MediaQuery.of(context).size.width / 2 - 65,
 5         child: GestureDetector(
 6           onTap: () => _mapController.startFollowingPosition(),
 7           child: InkWell(
 8             child: Container(
 9               height: 50,
10               padding: const EdgeInsets.symmetric(horizontal: 10),
11               decoration: BoxDecoration(
12                 color: Colors.white,
13                 borderRadius: const BorderRadius.all(Radius.circular(20)),
14                 boxShadow: [
15                   BoxShadow(
16                     color: Colors.grey.withOpacity(0.5),
17                     spreadRadius: 5,
18                     blurRadius: 7,
19                     offset: const Offset(0, 3),
20                   ),
21                 ],
22               ),
23               child: Row(
24                 mainAxisAlignment: MainAxisAlignment.spaceBetween,
25                 children: [
26                   Icon(
27                     Icons.navigation,
28                     color: Theme.of(context).colorScheme.primary,
29                   ),
30                   const Text(
31                     'Recenter',
32                     style: TextStyle(
33                         color: Colors.black,
34                         fontSize: 16,
35                         fontWeight: FontWeight.w600),
36                   )
37                 ],
38               ),
39             ),
40           ),
41         ),
42       ),
43   ]),
44   resizeToAvoidBottomInset: false,
45 );
46}
|
|
onTap: () => _mapController.startFollowingPosition()